Installation
Introduction
The Go Integrator software is supplied as an Internet download. It is a self-contained installer that contains the files needed to install a copy of Go Integrator Cara.
Before you start
Before you start, please check you have the following:
- A suitable computer for installation of the client software (please check minimum requirements)Go Integrator Cara System Requirements.
- A valid Access Code and user login credentials for Go Integrator Cara supplied by your Service Provider
Access Code
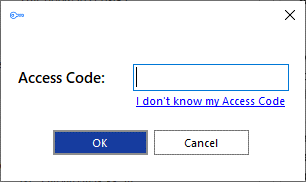
After completing the software installation process and depending upon the software configuration, Go Integrator Cara may present the Access Code input window on first launch. A valid access code, supplied by your service provider, is required to proceed to user login. The Access Code is only required on first launch of the Go Integrator Cara client and may have been entered during installation, in which case this window will not appear and user Login will display.

A shortcut is also placed in the Windows Start Menu program list to return to this step, if required.
![]()
Mass Deployment
Go Integrator Cara can be installed to the user desktop by silent mode using the command format: IntegratorInstaller-4.2.0.2050.exe /quiet
After silent installation, the Setup Access Code shortcut is created but Go Integrator Cara will not automatically start up.
Importing Data from Go Integrator v3
If enabled, Go Integrator Cara can offer to import configuration data from the Go Integrator v3. Data that can be imported includes:
- User login credentials.
- Presence window Favorites.
- CRM integrations (including 'controlled' integrations but excluding Outlook Contacts).
- Dialing Settings.
Note: Integrations that have a v4 integration available in Go Integrator Cara will still be imported as a v3 integration only, so will need to be configured again manually as a v4 integration if a new feature such as the 'Add Contact' feature is required.
The import process takes place on first login, after the access code is entered. Refer to 'Welcome and Login' for the detailed steps.

 Report this page